If you look unwell on the outside, your brain is probably unwell too. This isn't…
If you’re new to peptides, the idea of injecting yourself probably feels intimidating.
I get it. Even if you’ve done your research and understand the benefits, there’s a gap between knowing what peptides can do and actually knowing how to use them safely and correctly.
This guide bridges that gap.
Below, I’ll walk you through the entire process. Supplies, reconstitution, dosing, injection technique, storage, and troubleshooting. This is the same practical guidance I give my patients when they’re starting peptide therapy for the first time.
A quick note before we begin: This content is for educational purposes only. This does not constitute medical advice or create a doctor-patient relationship. If you’re considering peptides, work with a qualified practitioner who can guide your protocol.
Now let’s get into it.
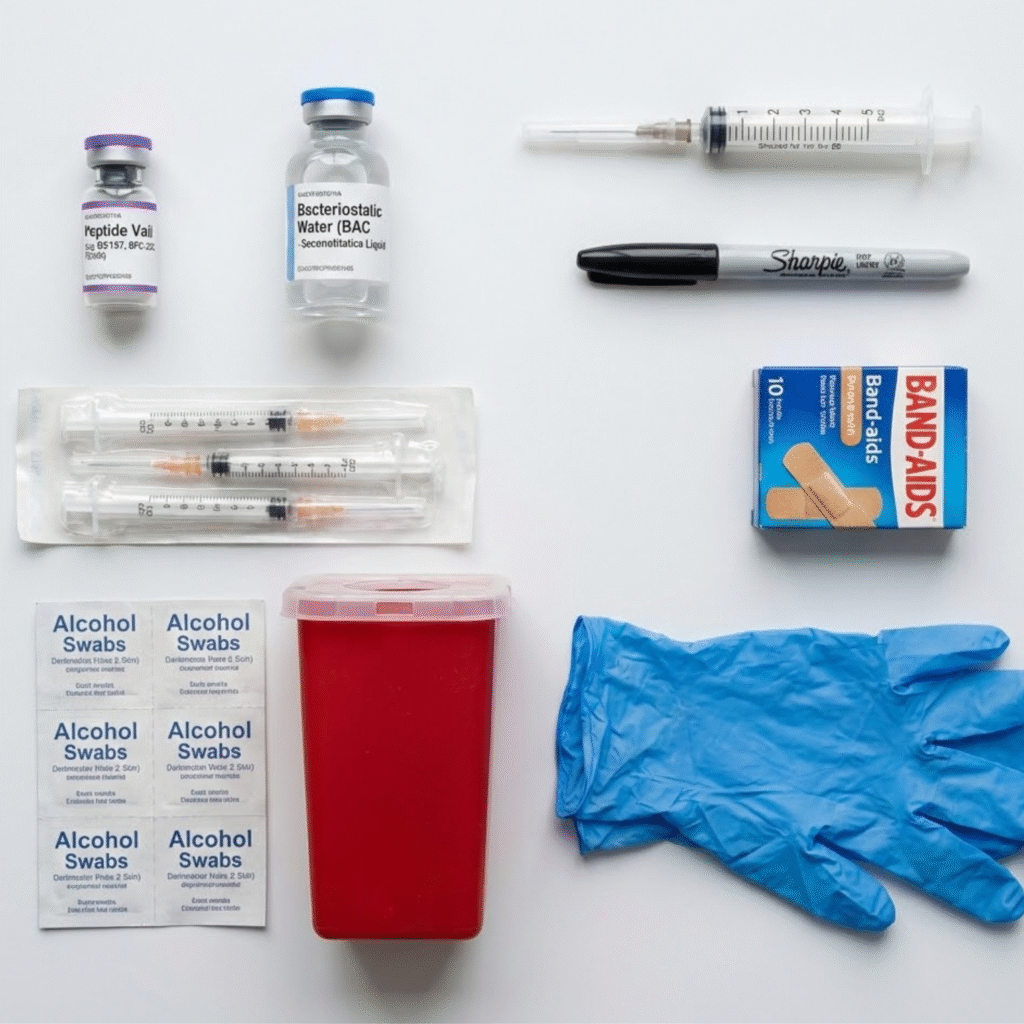
What You’ll Need
- Same image dimensions as other blog images
- Labeled callouts in brand colors (#F2B43A for accents)
- Professional product photography
Before you start, make sure your workspace is clean. You’re injecting something into your body. Preparatory hygiene matters.
Here’s what you’ll need:
The Essentials
Your peptide vial. Whatever peptide you’re using (MOTS-c, BPC-157, TB-500, etc.). I’m not here to promote any specific company. Use a trusted source, ideally one your practitioner recommends.
Bacteriostatic water (BAC water). This is what you’ll use to reconstitute the peptide powder. It’s just sterile water with a preservative to keep it stable.
Syringes. I recommend a 1cc (1ml) syringe with a 28-30 gauge needle, half-inch long. This is what most people use for subcutaneous injections. You can find these on Amazon or through your peptide supplier.
Alcohol swabs. Technically recommended for sterilizing the rubber tops of vials and your skin. I’ll be honest: I don’t always use them on my skin if I’m working in a clean area and my hands are washed. But as a doctor, I’m supposed to tell you to use them.
Sharps container. Non-negotiable. Used needles always go in a sharps container. Always. Never in the trash.
Optional but Helpful
A larger syringe (3cc or 5cc). Useful if you’re reconstituting a vial with more than 1ml of BAC water. Saves you from doing multiple draws.
A fine-tip Sharpie. I like to label my vials with how much BAC water I added and what my dosage is. Especially helpful if you’re rotating multiple peptides.
Band-aids. I rarely use them, but they’re there if you want them.
Gloves (optional). Really only necessary if you’re injecting someone else.
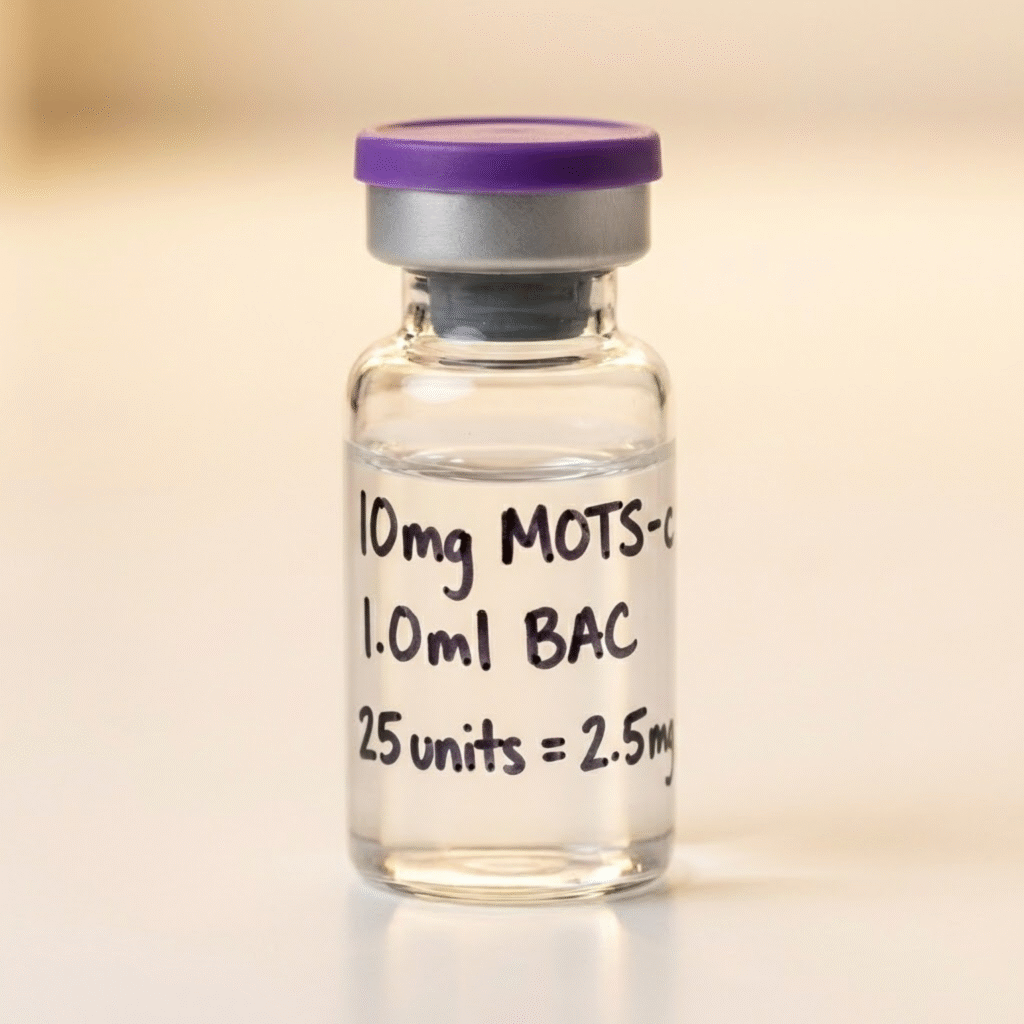
Step 1: Preparation and Dosing
- Match standard blog image sizing
- Show vial with Sharpie markings: “10mg MOTS-c, 1.0ml BAC, 25 units = 2.5mg”
- Professional lighting, warm tones
The first thing you need to figure out is how much BAC water to add to your peptide vial. This determines your final concentration and dosage.
Use a peptide dosage calculator. There are dozens online. I recommend this one as an option: Peptide Dosage Calculator. The goal is to aim for an injection volume between 10 and 50 units (0.1ml to 0.5ml).
Less than 10 units gets hard to measure accurately. More than 50 units creates a larger lump under the skin and can be potentially uncomfortable.
For example, if I have a 10mg vial of MOTS-c and I add 1ml of BAC water, then:
- 10 units = 1mg MOTS-c
- 25 units = 2.5mg MOTS-c
- 50 units = 5mg MOTS-c
However, if I have a 10mg vial of MOTS-c and I add 2ml of BAC water, then:
- 10 units = 0.5mg MOTS-c
- 25 units = 1.25mg MOTS-c
- 50 units = 2.5mg MOTS-c
I label my vial so I don’t have to recalculate every time. Small step. Big difference in consistency.
Important: Always follow the dosing recommendations provided by your own clinician. The calculator is a tool, not a replacement for medical guidance.
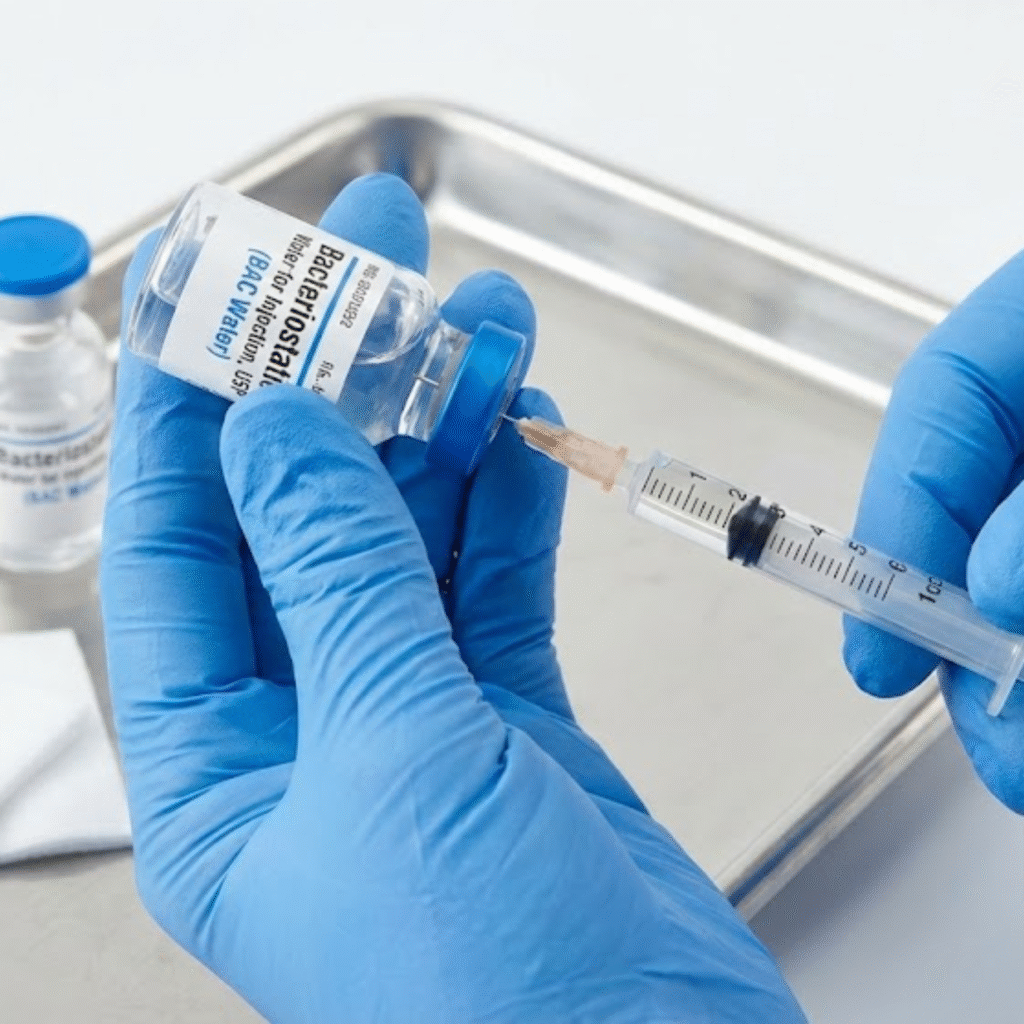
Step 2: Drawing Up BAC Water
- Standard blog image dimensions
- Professional hands, clean technique demonstration
Now we’re ready to reconstitute.
Wipe the top of your BAC water vial with an alcohol swab. I do this every time.
Uncap your syringe. You’ll see the plunger and the needle. Don’t recap it once you’ve uncapped. It’s a bad habit and increases the risk of needle sticks.
Pull back the plunger to draw in air equal to the amount of water you plan to draw. If you’re pulling 1ml, draw 1ml of air. This equalizes pressure and makes the draw easier.
Insert the needle into the BAC water vial through the rubber stopper. Aim for the center. Push the air in, then invert the vial and slowly draw back the plunger to pull up your desired volume.
Check for accuracy. The liquid level should align with your target marking on the syringe barrel.
Pull the needle out and set the BAC water aside.
Step 3: Reconstituting the Peptide
- Standard blog image size
- Macro/close-up photography showing technique detail
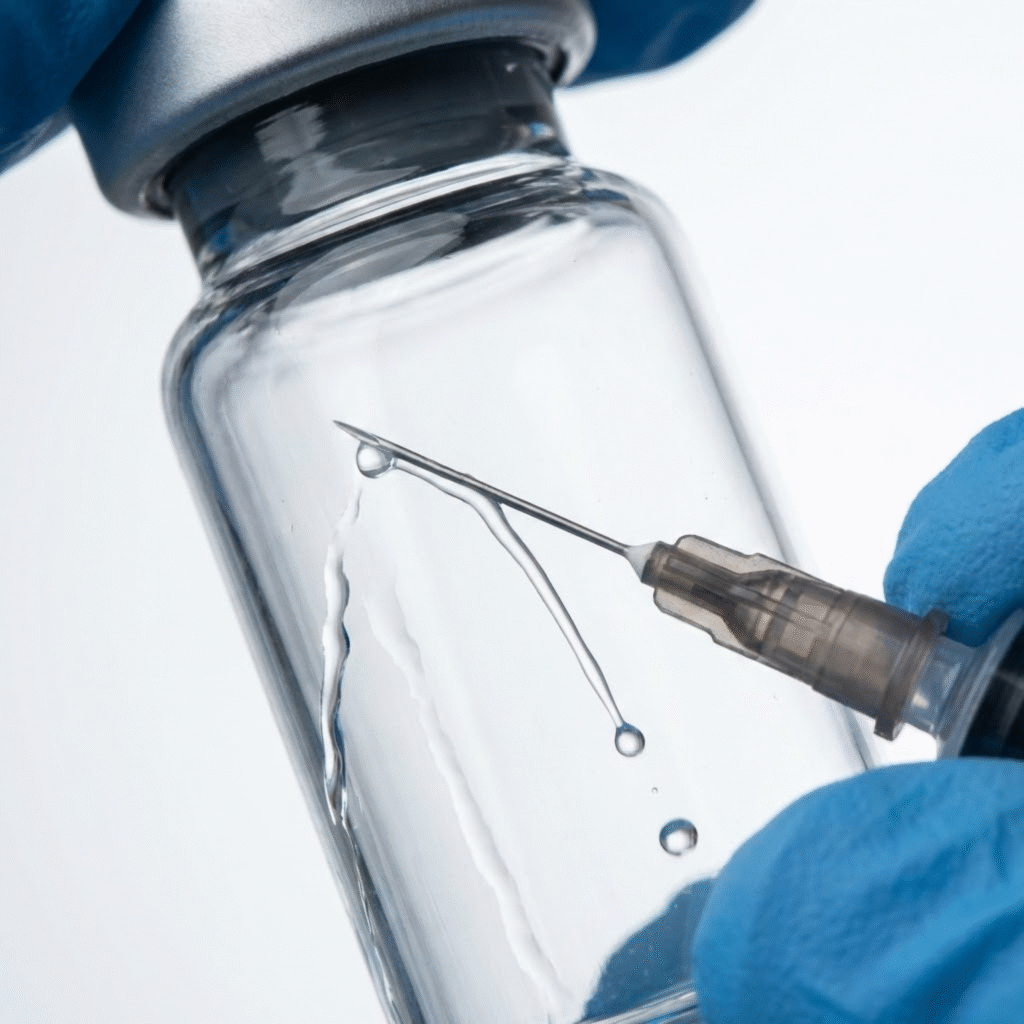
This is the most critical step. Peptides are delicate. You want to introduce the BAC water slowly and gently to avoid breaking peptide bonds.
Pop off the cap of your peptide vial. The rubber stopper underneath should be sterile, so you don’t need to wipe it (though you can if you want).
Insert the needle into the peptide vial. Aim for the center of the rubber stopper. Be gentle. These needles are delicate.
Angle the needle so the tip is against the inside wall of the glass vial, not directly over the peptide powder. This prevents blasting the powder with water.
Let the vacuum do the work. Most peptide vials are under vacuum pressure, so the plunger will push down on its own. Don’t force it. Let the water trickle in slowly along the side of the vial.
Gently roll the vial between your fingers to mix. Do not shake. Shaking can damage the peptide structure. Just slow, gentle rotation until the white powder fully dissolves and the liquid looks clear.
If you still see white specks, keep rolling gently. Once it’s dissolved, you’re ready.
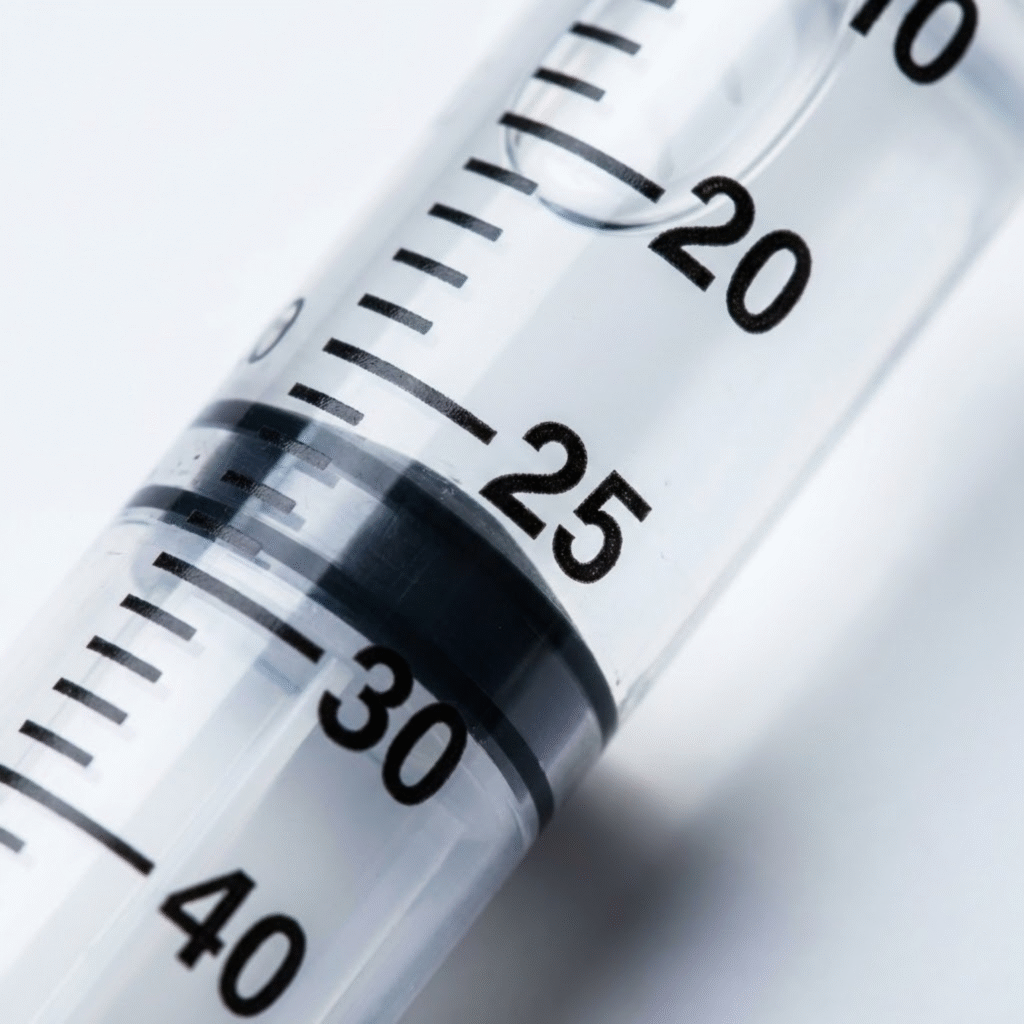
Step 4: Drawing Your Dose
- Standard dimensions
- Sharp focus on measurement markings
Now you’re drawing up your actual dose.
Push the plunger all the way down to expel any remaining liquid from your syringe (if you’re using the same one).
Insert the needle back into the peptide vial.
Slowly pull back the plunger to your target dose. If you feel resistance, the vial might still have too much vacuum. Pull the needle out, draw in some air, and inject the air back into the vial to equalize pressure. Then try again.
Check for air bubbles. If you see them, tap the syringe gently to bring them to the top, then push the plunger slightly to expel the air without wasting peptide. A tiny bit of air isn’t dangerous, but it’s good practice to minimize it.
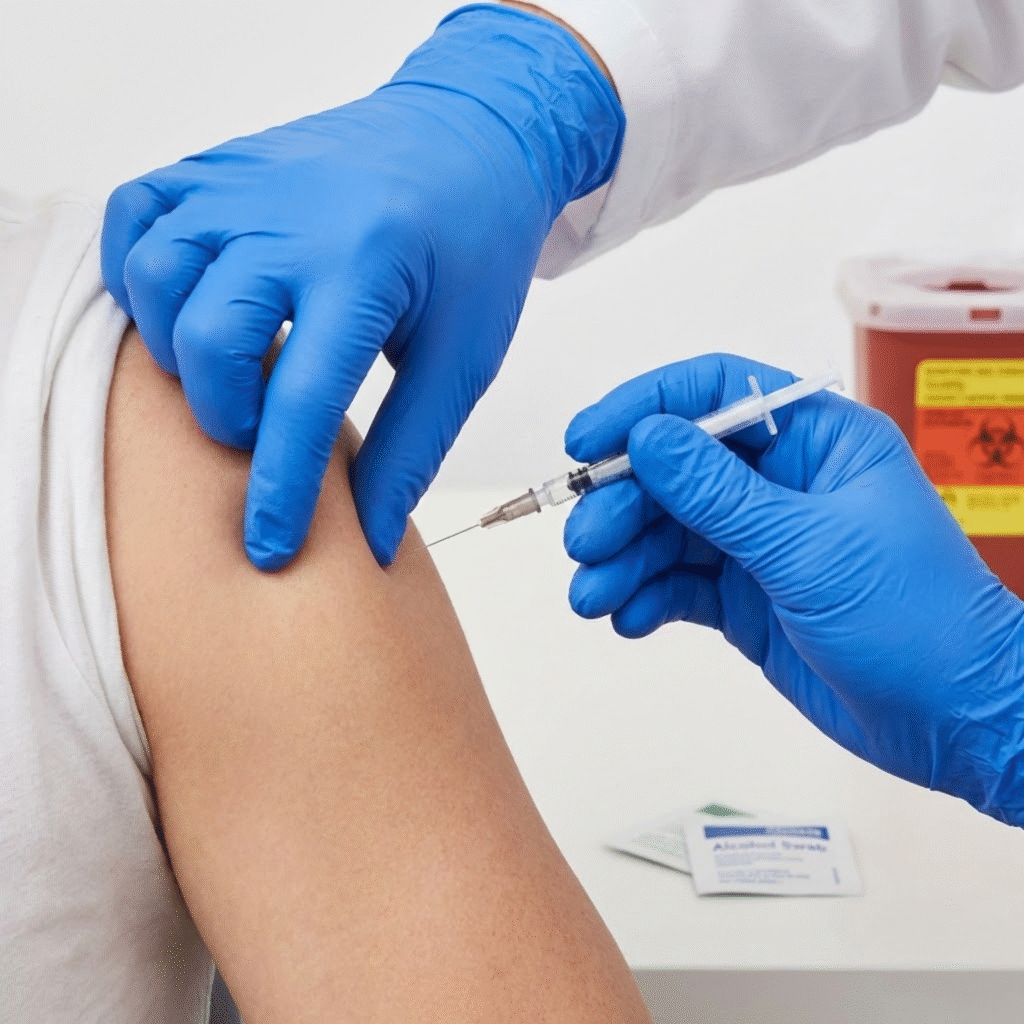
Step 5: Injecting
- Standard blog image size
- Shows proper 45-degree angle, pinched skin
- Professional medical demonstration photo
Here’s where people get nervous. But with a 28-30 gauge needle, this rarely hurts. And if it does, it’s momentary.
Where to inject
- If diagrams are used in other blogs, match that style
- Highlight abdomen, thigh, upper arm areas
Most people inject into the abdominal area. The “spare tire” region. You can also inject into the thigh or upper arm, anywhere with a bit of subcutaneous fat.
For certain peptides like BPC-157, you might inject near the site of injury (e.g., near the elbow for elbow pain). But for systemic peptides like MOTS-c, TB-500, or GHK-Cu, the abdomen works well.
Rotate your injection sites. Each injection creates minor micro-trauma to the tissue. Moving around prevents irritation, redness, or potential inflammation in one spot.
How to inject
Clean your skin with an alcohol swab if you’d like. I usually skip this step if I’ve just showered and my workspace is clean. Technically, I’m supposed to tell you to always use one.
Pinch a fold of skin between your thumb and forefinger.
Insert the needle at a 45-degree angle. The beveled edge (the pointier side) should face up, like landing gear on a plane. Go in smoothly. Don’t jab.
Push the plunger slowly. This minimizes discomfort and reduces the chance of burning, especially with more acidic peptides like GHK-Cu.
Withdraw the needle and apply gentle pressure if there’s any bleeding. Most of the time, there isn’t. If there is, it’s just a tiny capillary. Nothing to worry about.
Dispose of the syringe immediately in your sharps container.
Pro Tips and Troubleshooting
- Only if graphics are commonly used in other RoVive blogs
- Otherwise, keep as text with standard formatting
If it burns
Some peptides (like GHK-Cu) are more acidic and can cause a mild burning sensation. Inject deeper rather than shallow, and go slow. The deeper the injection, the less you’ll feel it.
If you hit a blood vessel
You might get a small bruise. It happens. Rotate your injection sites to avoid this. If you do get a bruise, it’ll heal quickly. These are tiny vessels.
If the needle bends
If it’s slightly bent, you can still use it (though I’m technically supposed to tell you not to). If it’s kinked or badly bent, toss it and use a new one.
If you’re nervous
Lightly scratch the skin near the injection site right before you inject. It distracts your nerves and makes the needle feel like less of a shock.
If the vial looks off
Do not use a vial that looks cloudy, discolored, cracked, or contaminated. When in doubt, throw it out and contact your provider.
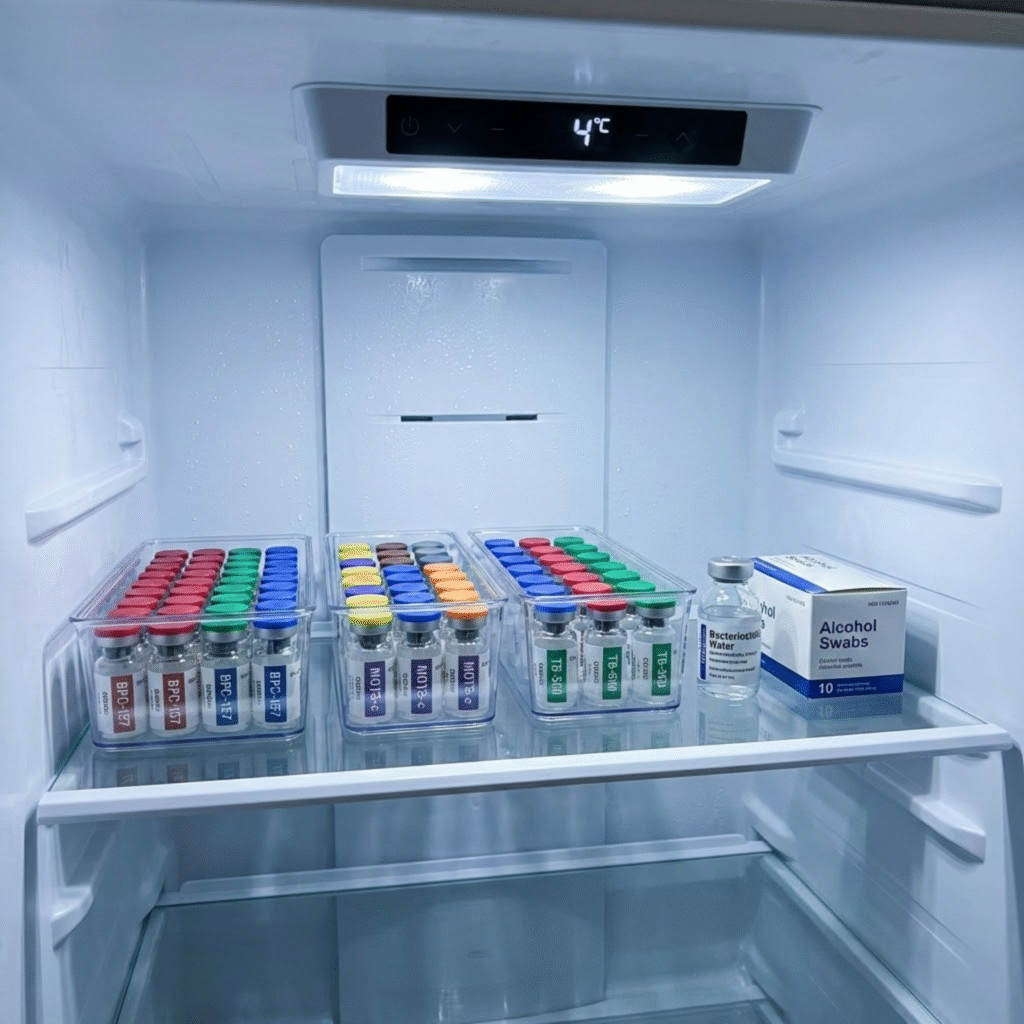
Storage and Stability
- Standard blog image size
- Clean, organized refrigerator shelf photo
Before reconstitution
Store peptide vials in the refrigerator. Do not freeze. Most peptides stay stable for at least a year this way.
After reconstitution
Once you add BAC water, peptides begin to degrade. Slowly at first, then more rapidly over time. Most peptides remain effective for 4-8 weeks in the fridge for most standard peptides. Some can last several months if stored properly.
Always store reconstituted peptides in a cold, dark place. Your refrigerator is ideal. Never freeze.
Use within the recommended time window provided by your clinician. If you’re unsure, ask.
Timing Your Injections
When you inject matters for some peptides, not so much for others.
DSIP (Deep Sleep Inducing Peptide): 30-60 minutes before bed
MOTS-c: Morning, as it can be energizing
TB-500: Any time of day. It’s more immune-focused.
BPC-157: Near the site of injury, any time of day
Don’t inject two different peptides in the same spot unless they’re pre-mixed in the same vial (like Ipamorelin + CJC-1295). Note that the majority of peptides should not come mixed in the same vial to begin with. Many peptide companies do not follow basic pH rules when mixing them in the same vial.
Final Thoughts

Peptide therapy can be incredibly effective when done correctly. The injection process itself is straightforward once you’ve done it a few times. Most people find it becomes routine within a week or two.
If you’re uncertain about dosing, timing, or which peptides are right for you, work with a practitioner who understands peptide therapy. Context really matters here.
For the YouTube version of this guide, I’ll be checking the comments. Something I don’t usually do. Because I know there may be good questions. So if you’re watching and have a question, drop it there. Others might benefit too.
If this was helpful, feel free to share it with someone who’s been curious about peptides but didn’t know where to start.
Take care.
Ready to explore peptide therapy?
If you’re interested in a personalized approach to peptides, hormone optimization, or integrative health, you can learn more about working with Dr. Yoshi Rahm at rovivemethod.com.
For administrative questions or to schedule a clarity call:
📧 heidi@rovivemethod.com
Resources
- Watch the Full Video Tutorial
- Peptide Dosage Calculator
- Call Us at: 858.295.7285
Medical Disclaimer
This content is for educational and informational purposes only. It is not medical advice, diagnosis, or treatment. Viewing this content does not establish a doctor-patient relationship with Dr. Yoshi Rahm, DO, or RoVive, PC, or any affiliated entity. Medical decisions should be made with your own licensed healthcare professional, who can assess your individual history, conditions, and needs. Do not delay, disregard, or stop medical care based on this content. If you are experiencing a medical emergency, contact emergency services immediately.
Related Posts